

I think if you're any kind of beauty obsessive like me, then you'll know that a good skincare routine is essential to good looking skin. Similarly, a good nail care routine will keep your nails looking fresh and healthy even without nail polish (gasp...why would you choose not to wear all those pretty colours!).
Some of these products in my nail kit are fairly new to my routine (Orly's glue basecoat for example, since swatching for my blog is a recent development :P ) but for the most part these products and tools have been with me for almost a decade, and that's saying something!!! (obviously the products haven't been with me for a decade; that's just gross, and they would be so out of date by now! I meant that I've gone through many containers of the same product).
First though let's talk about nail history. Throughout most of my teens I sported long nails, as an ex-nail biter (I know, look how far I've come! You can do it too!) thanks to the first set of braces I had when I was 11 (you heard correctly, I needed to have a second set put in when I was 14-ish because the first orthodontist messed-up) which made it too painful on my teeth to bite. So there you go, braces are good for fixing your teeth and your nervous nail biting habits as well. :P
Now though I much prefer short nails (way more practical), what you see in the photos is what I would call long: I've found that slightly longer nails look better in swatch photos for me anyway (I know I won't be breaking any Guinness World Records any time soon). With this in mind, I've noticed that my nails peel a lot more frequently than they used to, which is I'm sure explained by the fact that I always have polish on my nails (I'm just happy I don't suffer from polish staining) which is something I only really started when I was 17. But I also used to wear a lot of black back then, so I'm still in my "having fun with colour" phase of my life, and why not?


NAIL POLISH REMOVER
First up, nail polish remover! Now back when I painted my nails very rarely, my go-to remover was the Mavala one from John Lewis, but I stopped using it when I couldn't get my hands on it as easily due to fewer visits to the UK and I was using up my bottle more quickly because I was starting to wear polish more often. Then I started using random removers until I came across my favourite one; the Bourjois Gentle Nail Enamel Remover (which doesn't seem to be available in the UK but which I buy from my local Di), which unlike most removers smells like sweet berries (with a hint of the characteristic smell of remover though). Because it's acetone-free it is less drying for my nails in the long run, but it doesn't remove polish as easily as my alternative choice Maybelline's Dissolvant Express (which I buy it in my local food supermarket; Delhaize). So I do use both depending on the difficulty of the polish (I wouldn't attempt to remove a glitter polish with the Bourjois one, that's for sure!).
COTTON BUDS
Now I do tend to use tissues folded in four with my nail polish remover (I don't like cotton balls because of that scratchy feeling...you know like chalks on a chalkboard...shudders) but for the nooks and crannies that are the cuticles (since I do apply polish by flooding my cuticle most of the time) I just soak a cotton bud in remover and eliminate any left-over polish that way. And of course, because I'm just that sad, I do have my favourite cotton buds (in my defence some just lose their cotton halfway through trying to remove a polish because they're not glued on properly). In the UK I used to use the Johnson's Cotton Buds but in Belgium I buy the Lotus Cotton Buds, both equally good!
NAIL BRUSH/CLEANER
Once that's done, I go in with my Boots' Clear Nail Brush and soap to clean any remaining polish remover and dirt from under my nails. I know some people like to purposely use remover before applying polish to dry out the nail for a better polish "grip", but as I've said before, my nails peel, so hydration is key for me and personally with a good basecoat, polish "grip" shouldn't be an issue. But to each their own, if it works for you, then by all means don't let me stop you!

CUTICLE PUSHER
This is one of those of those tools that I've literally had for a decade now, I got this particular cuticle pusher (similar here) in a mini Nail Kit from Marks and Spencer (similar here) when I was just 14. I used to carry this kit in my school backpack for any nail-snagging emergencies (back when I had long nails, this was an issue) and it became known in my class that I always had this kit on hand. The number of times friends asked me to borrow a tool (usually the mini nail file or mini nail cutter), girls and boys alike, would astound you! An incredibly handy kit to have (plus it easily fits in a handbag if you've outgrown your schoolbag).
A major tip when using a cuticle pusher is to use it after a shower or bath when your skin has softened and is more malleable, it's a much more pleasant process than the painful one that occurs if you haven't soaked your hands in advance.
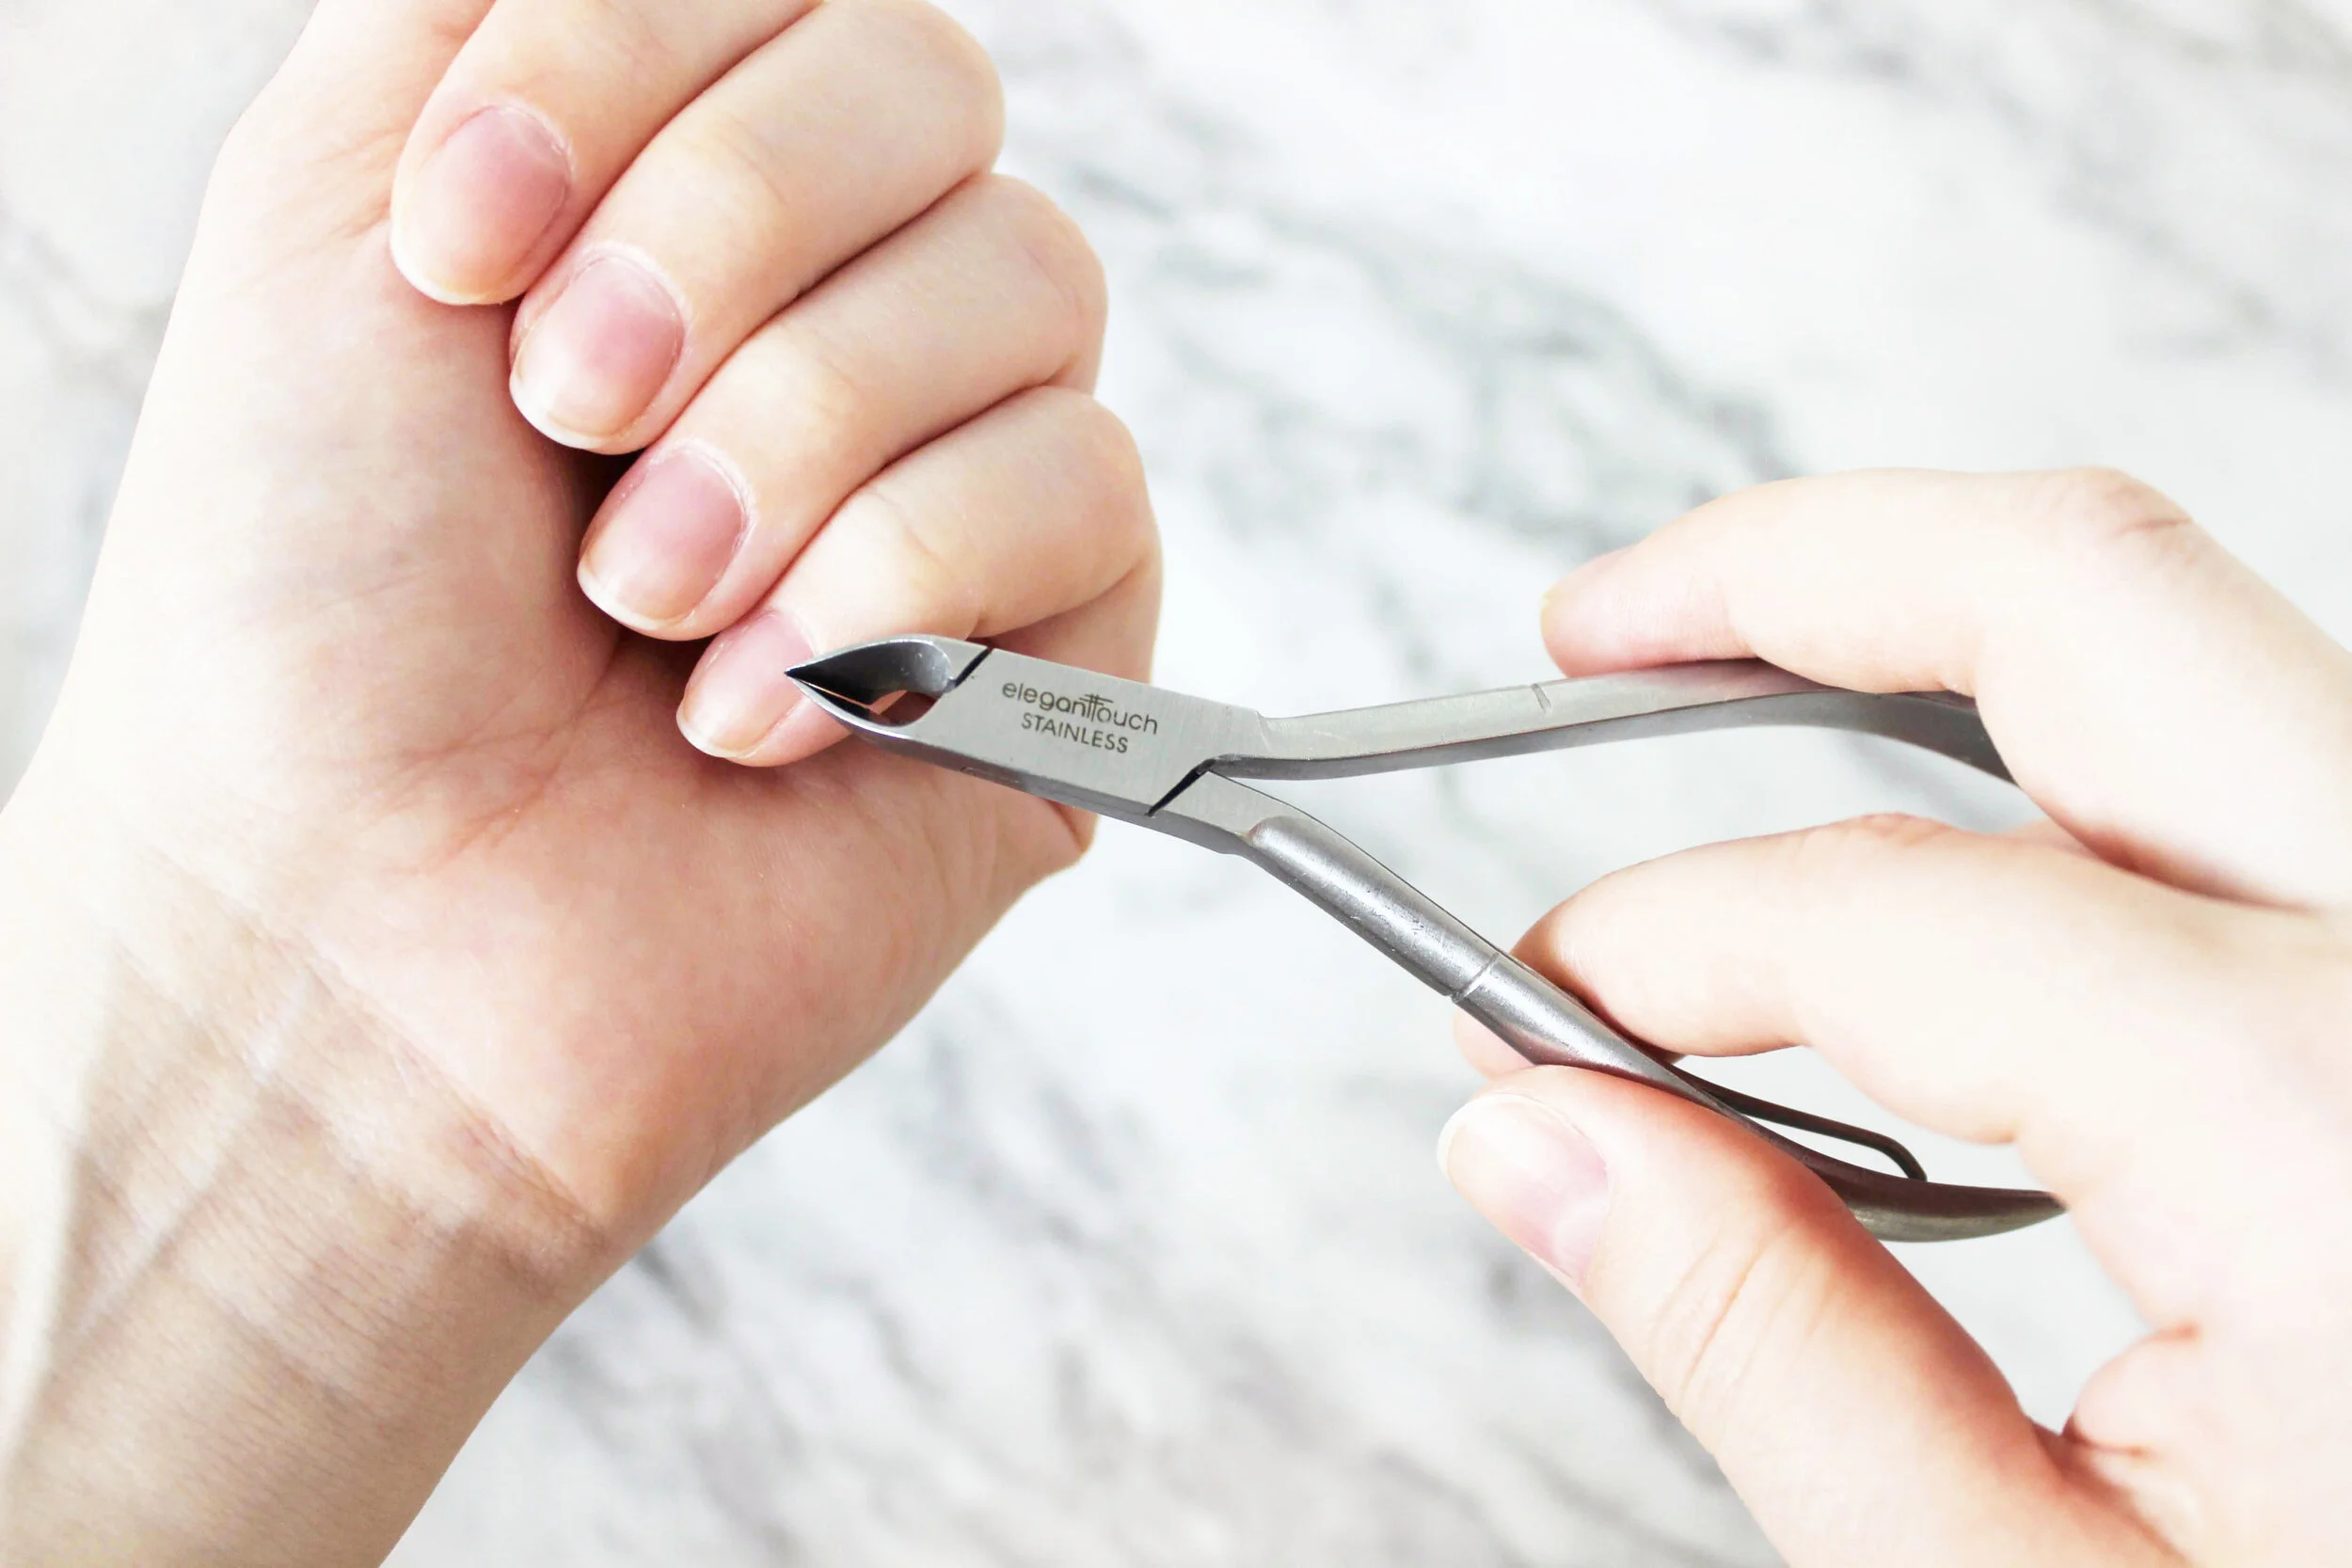
CUTICLE CUTTER
When I seriously got into nail care I knew I needed a cuticle cutter, but back then it wasn't as obvious what that was exactly, and I ended up with some kind of weird mini two pronged fork attached to the other side of a cuticle pusher (currently fallen behind my heavy dressing table...RIP); and I still have no idea how THAT was meant to work?! Other "cuticle cutters" just look like plain scissors, which again, NO! What you are looking for is something similar to the picture above, they kind of look like scissors, but aren't, and are just dull enough to only be able to cut cuticle skin and not anything more.
I always use a cuticle cutter straight after I've used a cuticle pusher (while my skin is still soft from the warm water used prior), you want that little amount of skin to be free from the nail (it's usually that transparent bit of skin that tends to cover the half-moons on your nails) and easily grabbable by the cutter (once it's been pushed back by the pusher) to then cut away. Again, your skin should be softened beforehand by warm water to avoid pulling anymore skin that necessary. In the photo above, you can see that I have a little bit of excess cuticle on my half-moons, but I didn't deem them "long" enough to cut, you really only need to cut your cuticles once a week, if that! Otherwise, you're not cutting cuticle skin and you don't want to give yourself an infection by cutting too far (gross I know! But it can happen, especially if you don't know what to cut or how to cut the excess skin properly).

NAIL SCISSORS
Ok so these might not technically be nail scissors, I think they're meant to be dressmaking scissors, they're small and have straight blades (similar here) but I personally don't like the rounded effect of true nail scissors, I feel like they give me less control over the final shape of my nails (I like a squoval shape; a rounded square shape basically) and since I always file my nails to get that shape, the sharp edges created by straight scissor blades always get softened down. If you don't file nails, I can see how rounded scissor blades are better as they give you zero snagging possibilities in just one cut. But this really is down to personal preference. :P

NAIL FILE
Personally, I don't understand those cardboard nail files that seem all the rage, they are very gritty and tear the nails more than anything (plus you have to keep buying new ones), and with someone with peeling nails already they're really not ideal! I've been using the Pfeilring Nail File (similar here) for easily ten years now (my mum introduced me to it as a kid), and I've only just recently bought a new one because my old one was getting a bit dull (used once a week for ten years that's some serious bang for your buck!).
When I was a teen and still sporting long nails I preferred a crystal nail file (similar here) because as the "grit" is more finely milled it doesn't take off quite as much from the nail on one swipe as the metal nail file does (minute distinction but when you're trying the maintain long nails it makes all the difference). But since I'm rather heavy handed these crystal nail files seemed to be a bit too fragile for me; I broke one while filing my nails, accidently stepped on another, so this is technically my third one (and twice the price of the metal one I might add). It has only lasted me this long because I rarely use it, what with my short nails and all that! So the metal one it is!
Contrary to cuticle pusher and cutters, it's best to file your nails when they aren't softened by warm water. The nails give more resistance to the file that way (especially if your nails tend to be bendy like mine) and are much easier to file. Once finished I like to wash my hand with my Nail Brush again to remove all the nail powder that happens when you file nails.


BODY BUTTER
Next comes hydration. I've lost count of the number of hand creams I've tried over the years and none have worked as well as The Body Shop Body Butters. I always apply my "hand cream" before bed, and I still remember the one that made my hands unusually greasy and sweaty all of the next day even after washing it off (not quite what I was going for when I was looking for "hydration"). The Body Butters changed all that, I think I had run out of said random hand cream and still had a tub of Body Butter on hand to moisturise my legs after shaving (check out my Winter Saviours post for more info) and I just used that. A pure miracle I tell you!!! It didn't leave my hands greasy at all and moisturised them perfectly! I've since tried The Body Shop's purpose made hand cream (in their Christmas limited edition Glazed Apple), and it's not quite the same level of hydration, but it works fine.
Now not all Body Butters are made equal; some tend to be thicker than others. I've noticed that most of the citrusy scented ones are slightly thinner in consistency, which makes them a tad less hydrating (great in the summer when you don't need much extra hydration), but the Strawberry one has a very thick consistency which is perfect for the winter. I apply mine every night before bed (I adjust the scent and hence consistency according to the season) and I have perfectly smooth hands for the whole day. The Body Shop also sell them in small tubs, so packing and travelling with them is no issue either!
As you can see in the second picture above (it should be flipping between images) I focus my cream on my cuticle area (as well as my knuckle area), this saves me from having to buy any cuticle oils, though I must admit I'm very tempted to try out the Essie Apricot Cuticle Oil, but really I have no need for it.
P.S. My brother and father have also asked to use my Body Butters when their hands have been particularly dehydrated in the winter, and they both loved it as much as I did.


NAIL STRENGTHENER/BASECOAT
As I've mentioned before I have rather weak and peeling nails, so Essie's Grow Stronger (now discontinued and which I’ve replaced with Essie’s Strong Start) basecoat has been a nail saviour for me. I've tried the OPI Nail Envy too and although good (I have yet to try the new formula), I've noticed a bigger difference in my nails when I use the Essie strengthener. Plus, because I mostly like to use Essie polishes (I'm loving their new and improved formulas that they've had in their latest collections; at least for the last two years) the Essie Grow Stronger meshes well with their polish formula duh...same brand! and it provides all the extra "grip" an Essie polish might need to last longer.
I use Essie's Grow Stronger before any nail polish application as a basecoat; it can also be used as a treatment which is how I initially used it when I first discovered it and my nails needed it the most. I generally only apply fresh nail polish (and hence basecoat) after I've washed my hair (I'm heavy handed and this means I'm less likely to give myself chips as I have at least 4-5 days between hair washes...dry shampoo people!), in the evening before bed and before I've applied my Body Butter (above).


PEEL OFF BASECOAT
When I started doing swatches for this blog (especially with the glitter polishes from the OPI Starlight Collection) I had heard about DIY glue basecoats that peel off your polish easily, but while browsing Di, I found this Orly One Night Stand one (not too expensive and one of the few on the market anyway, so why bother with a DIY) so I decided to give it a go. Needless to say, it's hopeless if you want your polish to last (1 warm bath and my polish was slipping off) but for swatches it's Heaven! Now I can apply polish, photograph and peel in a short amount of time without endlessly damaging my nails with polish remover or having to inhale that smell repeatedly either (the polish fumes are enough thank you!).
When I use this Orly basecoat I DON'T apply my Essie Grow Stronger beforehand as it needs to be in direct contact with the nail to be able to peel off. So all in all an amazing product, just not how it was intended to be used (glitter polish is even worse as it tends to snag on things, add to that a peel-able basecoat...just doesn't work!).

So there you have it, all the tools and tricks of the trade in one small nail kit! My nail care routine is definitely thanking me with beautiful nails, when I'm not chopping them off that is!
What's in your nail kit?
Do you have a nail care routine like I do?
What is the most bizarre nail tool you've come across? Nail cutters was definitely mine, but I haven't looked back!
Do you have a specific nail treatment that you think I should try?
xxxemma